I made my own labels - for 7p each!!

I once tried to make a label from a piece of ribbon and some
very dodgy hand stitching (it looked like when you used to write HELLO on your
calculator) so abandoned labels for a while after that. Lately though, I’ve wanted to add a professional finish to my homemade items, and I think adding a label can help do
that. There are lots of tutorials online and numerous different techniques have been suggested, but I thought I
would share with you how I made mine too, ‘cause you can never have too many
options!
You will need:
- Your design
- Computer
- Fabric Paper
- Basic sewing equipment
- Very little computer knowledge!
I started off with some doodles before finalising my idea,
however after 40 different attempts at drawing a decent cotton reel and writing
my name until it lost all meaning (this happened after doodle 27, if you’re
interested) I scrapped this idea entirely and instead, decided to link
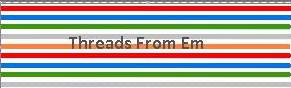
the label design to my blog (“consistent branding” if you will). On the
computer, I copied the background image at the top of my blog, and simply typed
‘Threads From Em’ in grey. I did this on Paint – (I know some people may gasp in
horror at this, but I’m not the most techy person in the world, and paint has
always been a friend of mine!)

When I was sure I was happy with the look of the design, I
saved the image and moved across to Word (gasp) and pasted the image into a
table. I could only fit two columns of my label on to one sheet,
because I was mindful of leaving a large enough border on all sides for
finishing the raw edges, but if you’re design is smaller, you can easily fit
loads more on!

Load the printer with your fabric paper - which is really great stuff! It is basically cotton fabric, backed onto paper which you peel off when your design is printed, I got mine here, set the print settings correctly as per the manufacturers instructions - I recommend a
test run on bog standard A4 before printing on the paper, you want to make sure you’re happy with how it looks and the size etc., then print away!

Then cut around each one:

There are two ways I have finished the labels, one by
zigzagging around the edge for a fun finish on a child’s garment, and the other
by pressing and stitching a neat border around the edge.


Also, when I finally get round to making the Great British
Sewing Bee PJ bottoms for my boyfriend, I have some more
boy-friendly coloured labels too!
Oh and did I mention, mine worked out as a mere 7p per label?! (actually, o.o662p, but whose counting?!)
This is brilliant!! I have personalised labels I bought ages ago, but I don't have many left, and had been looking on etsy for more. I wanted a certain design, and it all seemed like a bit too much hassle to order it specifically. This looks so easy, and I love the price!! I'll have to try it out. Thanks for the hint!
ReplyDeleteI did exactly the same thing for my labels (except I have a cartoon picture of a cat naturally!) It's brilliantly cheap & personalised. Yours look great!
ReplyDelete